
Outdoor Photography Like the Pros
“Stop it!” I want to shout inside my head. Everywhere I look is a photo opp. It’s one thing when everything I see is a potential story. But when thoughts become images there’s no room for anything else. Like how photos take up more space than documents on your harddrive? Plus, I’m usually driving. If I pulled off every two minutes I’d never get where I wanted to go. But I can’t turn it off.

I spent two days straight during the HERA Climb for Life with pro photo dudes Jay Kinghorn and Jeremiah (Miah) Watt and a small gaggle of outdoors folk who – in a nutshell- wanted to take better pictures. Some had point and shoots, some borrowed gear and looked like they were part of Time Magazine’s staff. All cared about lessons.


Tip #1- Move. The better players are the ones who go after the shot not the ones who wait for the shot to come to them. That’s why I suck at tennis.
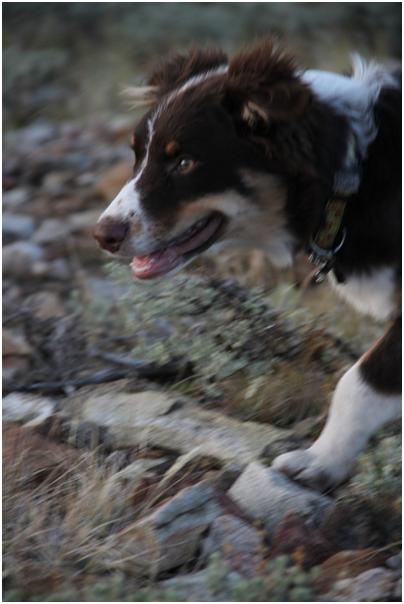
I’m lazy. We shot the sunrise off Guardsman Pass at 7 a.m. Saturday morning. That meant waking at 5:30 a.m. Ouch. While everyone else was tromping around the steep hill side. I planted my feet and extended and retracted my zoom lens. I’d rather shoot a sunset. I guess it showed. We all met back at Black Diamond Equipment (basecamp for the Climb4Life), where BD’s photo editor Sandra Salvas critiqued our images. One of the first things she said was, “Don’t be afraid to move. Get in close, get low, step far away and shoot wide.” Don’t just stand in the middle ground.
Sandra had worked for Forbes Life Mountain Time, Warren Miller, and SKI Magazine before she moved to Park City to work for BD. Here she’s an editor, stylist, director, photographer
for marketing materials, tradeshows, catalogs, the website, visual merchandising, and advertising campaigns. Her advice? Be present and be aware of what’s going on around you. She did a live edit of Miah’s photos so we could see why she likes or doesn’t like a picture. Then she walked around and spoke to us individually about what she liked and what might help make our photos better.
I’m not a photographer and never professed to be one. Ever since Ryan told me I danced like Elaine from Seinfeld, I’ve been overly self-conscious about dancing in public. Ever since Lisa threw my photos under the bus in front of a crowded room of photographers at an OWAA conference last year- making all of them laugh at my expense- I’ve doubted my abilities. I’m super competitive and my hardest critic. But if I don’t know what I’m doing wrong and how to get where I want to be, I tend to stop trusting my instincts.

My images do get published because they tell a better story to my story than stock images. So it pays to know what I’m doing behind a lens. The outdoor photography component of the 11-year Climb For Life is part of a growing trend to include photography workshops whenever possible. Not everyone wants to be the action, they’d rather shoot it. And everyone has a chance at greatness with modern camera technology. As much as I wanted to climb, I knew I couldn’t miss this opportunity to learn from those who not only rock their fields but know how to get more out of you without destroying your drive.
When I brought back my first batch images from Day 1, Jay, Sandra and Miah all asked what do I like; which pictures are my favorites. I didn’t know anymore after the OWAA roast.
Tip #2 – When you shoot a sunrise put less land in your frame to get the right color/exposure/light. But avoid too much sky unless it’s spectacular.
Tip #3 – Rule of thirds. Always. Don’t put your subject smack in the middle of your frame. It’s boring. If you have to, crop.

Tip #4 – Shoot in layers. If you use a high aperture (That ‘f’ in your display) you can put more in focus.
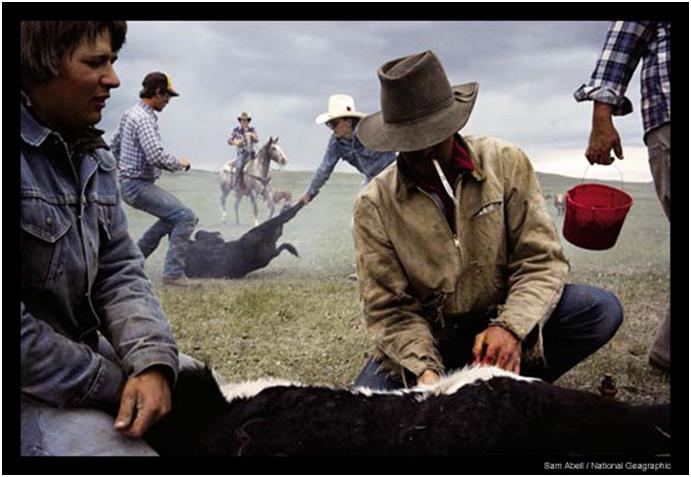
Jay brought up a Sam Abell’s Branding photograph. The image is a quintessential example of composition and layering. The more layers you have in your photos the better. Try to have at least three points to make. And with that we had lunch and headed out to shoot bouldering and portraits.
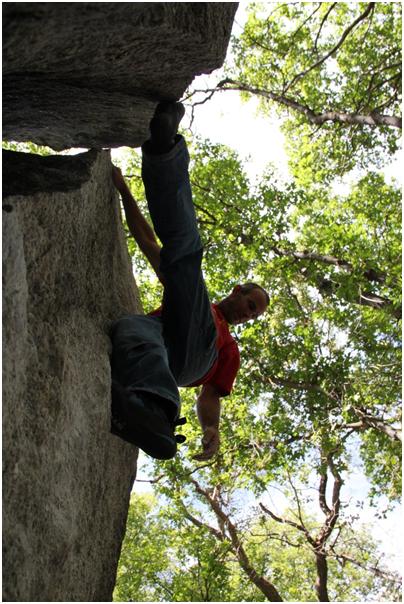
Tip #5 – When shooting bouldering try not to remove the ground. It gives perspective.

Tip #6 – Know where your subject is going to be; anticipate. Have your model do the route a few times so you know the moves ahead of time.

Tip #7 – Find inspiration; something that gets you psyched.
Justin scrambled up and down the boulders at 5-Mile in Little Cottonwood Canyon for our benefit. Miah coached us individually to set up the ‘perfect’ shot but I wasn’t feeling it. There just seemed to be so much dirty stuff in the way. Not to mention that I’m not a huge fan of bouldering. We crossed the highway and headed down to the creek for our portraits where I found more passion. Jay discussed lighting. At midday, it was harsh. The shadows did no one any favors so we tried reflectors (we used white boards to bounce light from the sun back at our subject) and shaded areas.

Tip #8 – Backlight is your friend.
At just the right angle (and without using your flash) you can get both a ring of light and still see your subject. Try a variety of angles and don’t give up.

Tip #9 – Be comfortable with your camera and make your model comfortable.
I got Jay laughing when I pretended to be a French fashion photographer and told him to “make luv to ze camera.”

Give your subject tons of feedback. Let them know what they can do to help you take a better pic. Chat with them, explain to them what you are doing.
Tip #10 – Don’t keep looking at the back of the camera. You may miss ‘the’ shot. Make sure you are there and present.
DAY 2
The next day we rose slightly later, whew, leisurely conferenced over coffee and bagels from Einstein’s and carpooled back to the 5-mile pullout. Today, we delved into macro photography.

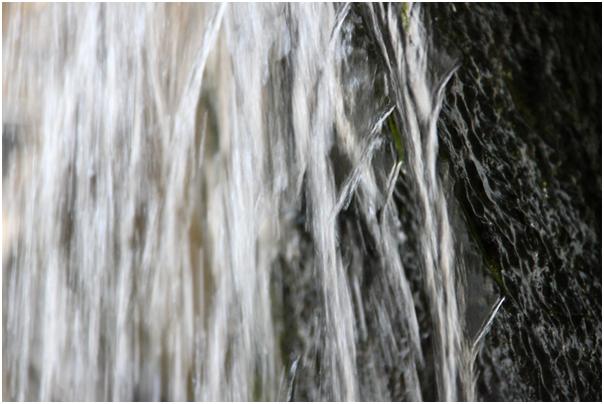
To get water to look like a veil, slow down your exposure (test 1/30 or 1/60 of a second) and have a steady hand or tripod.

Tip #11 – Be conscientious about little things poking into your photo from the sides. Also the ‘hotness of the background can take away your focus. I.e. watch out for sun flares in the corners of your image.

We rallied back at BD for the final individual critique and a little slideshow of our work. I can’t believe that I actually saw improvement in everyone’s pictures. Even mine.
I now realize that Lisa was abusive. Her attempt to be funny without ever explaining why a picture ‘fails’ (in her mind) would only stifle someone’s desire. It helped nothing. To be fair, she didn’t know those pictures were mine. It was part of a photo scavenger hunt contest. But what I’ve learned after this weekend is that everyone has potential and everyone can improve with feedback that emphasizes the good and points out what could be better. Take lessons from someone who can nurture as well as teach. It’s not about who’s better but being your best. Everything you see is one click away from being a compelling photograph. Read all about the type of images you want to take, bust out the camera and start snapping away. And make sure you sign up for clinics like the one during HERA.